How to Shoot an Eclipse (Might be Useful in 2026!)
Hi Guys,
I remember the last eclipse fairly well. I was 9 or 10, my Grandad took me and my brother outside on a bright summer's day, and showed us how to watch the shadow of the eclipse forming between some sheets of paper. It was a lovely childhood memory.
But this time, I had an SLR!
In advance of the 2015 eclipse, I researched the usual viewing methods - special glasses, DIY pinhole viewing boxes etc - but the only advice which really appealed to me was how to film or photograph the eclipse properly. After all, this is the 21st century.
The easiest way to shoot it without blowing out the image or, worse, damaging your camera was to buy a solar filter to attach to your lens. But these cost around £80, which was a lot for a single use, and plus the delivery time meant it would arrive a day or two after the eclipse. Strike that idea.
The other advice was to use a pinhole camera - or to convert your camera into one - so that 90% of the sun's rays wouldn't make it into the lens. Again, you could buy a 'safety guard' for the end of your camera, with a pinhole in it, but that also involved money. There were a few examples of people converting lens hole covers into a pinhole lens by drilling a small hole in the camera... but I don't own a drill.
 And so, taking all this research into account, I set about building my own DIY pinhole attachment for my camera - and I planned to do this as cheaply as possible whilst still creating a good-enough quality image, and protecting my camera from harmful rays.
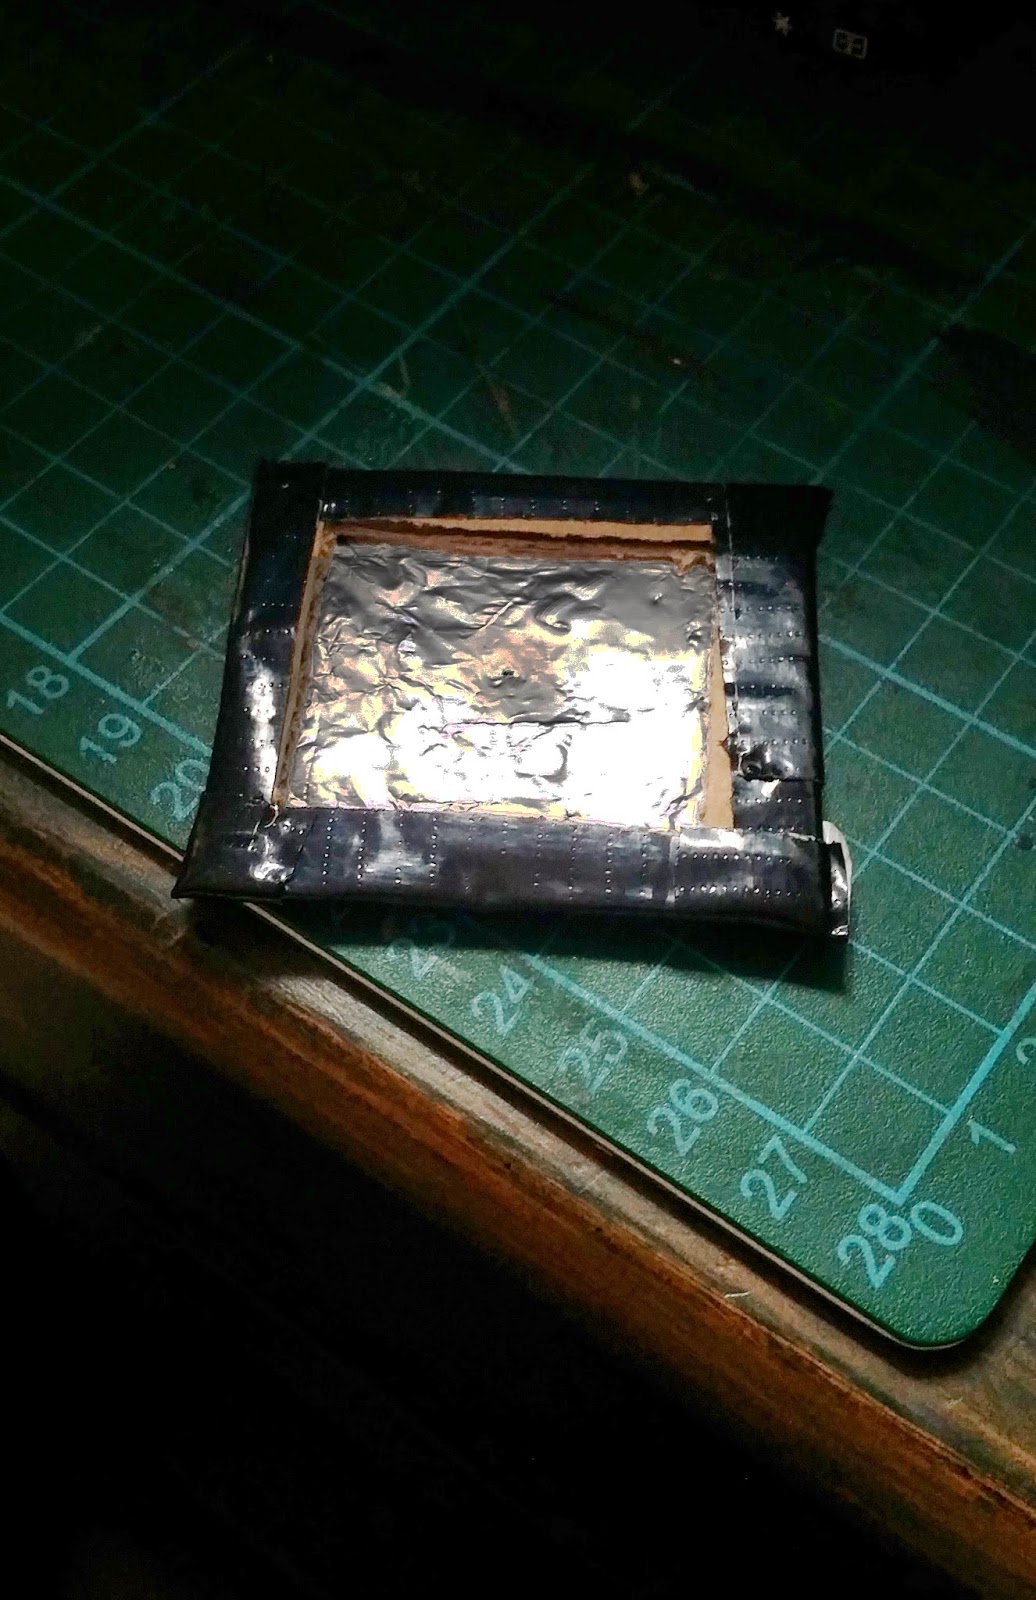
Using the BBC's guide to building a pinhole projector, I adapted these steps into creating a little pinhole cover to attach to my lens. I did this using cardboard, foil and gaffer tape, and made sure to pull the foil taught. I then put in the pinhole using one of my sewing pins.
Attaching this to a lens was the tricky part. First I put my basic UV filter inbetween the two (I wasn't taking any chances!), then I used low-tack blue tape to stick it onto the lens - the kind you use on film sets to give an actor their mark. It has a very low residue, to risk making my lens sticky and ruining its zoom function. High tech stuff indeed! (Unfortunately it was so low-tack that the whole thing had fallen off by the morning of the eclipse, so I had to secure it with Gaffer tape in the end).
Unfortunately the longest lens I had was my 80-200mm zoom, so I was never going to get a close, crisp image of the eclipse. But on the plus side, this was a vintage lens I got for £30 to experiment with, so it wouldn't have been too much of a loss if I had covered it in tape residue!

The best view of the eclipse was from my bedroom window (which was rather dirty - you can tell that in the final footage!) and luckily I was in one of the only areas of the UK with no clouds that morning.
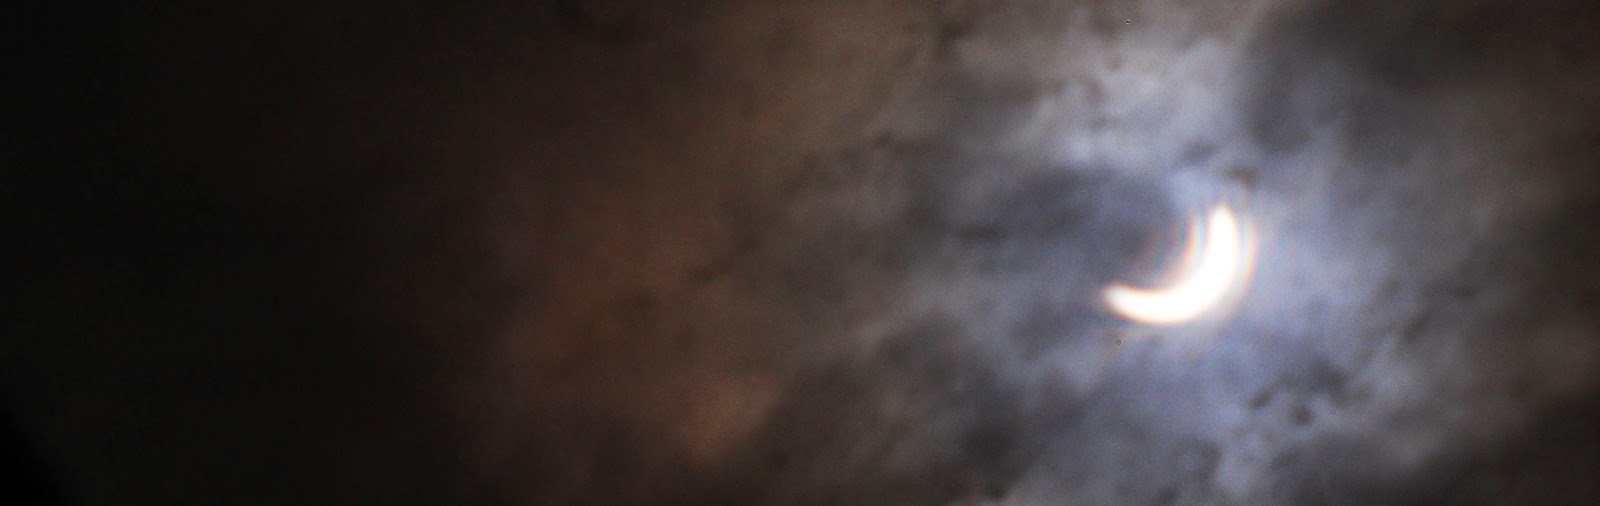
I didn't think the pinhole attachment would work at all (foolishly I thought I'd just see a black frame with a tiny dot of light poking through the centre), but I tested it on a lamp the night before and it worked perfectly. As you can see from these images, at first the sun was still too bright to see the eclipse, but it created some wonderful coloured lens flares, and you could make out the shape of the eclipse in these.
Below is the footage I got, for better or for worse. Very little happened for a long time, but I used some timelapse, and this made it more interesting (and more creepy) because you could see the lens flares spreading apart, and the clouds moving.
Sophie
Comments
Post a Comment