Layer by Layer: The Ashes 'Toybox' Dress
Hey Guys,
For all my moaning about the difficult crowdfunding session we had during pre-production, that's not to say that there weren't people who donated to Ashes. I still feel extremely grateful to the people who did contribute, and hopefully these posts (combined with Neil's - the latest of which you can see here) will show them how their money was put to good use.
One of the people who donated to the project was none other than Chris Laverty of Clothes on Film, the much-praised costume blog (nominated as blog of the year by Total Film and one of Channel 4's top fashion blogs), so of course, as a Costume Designer by trade, his support meant an absolute load to me.
When I bought the powder blue chiffon, I draped it over the white inner layer to check how it fell, then pinned it into place. I wanted the dress to be fitted at the top, holding Sarah in where she needed support, but be A-line down the rest of the body - basically more 'floaty' - because I knew that she would be sitting down through all of the scene, and it needed to sit well around her legs.
However, a mix of the many bulky layers with the fact that chiffon is notoriously difficult to work with meant that the dress finished up looking fitted on Sarah - particularly when she sat down. But sometimes you have to shut up and let the fabric tell you what to do, even when you're as stubborn as chiffon yourself!
Anyway, the chiffon outer layer was the last part to be attached, so once I'd tested the fabric, I unpinned the chiffon and returned to the inner layers. I added a layer of organza to go directly under the chiffon to bulk it out and stop it from being fitted (or so I thought), and finally lined the whole thing with an opaque blue muslin-type fabric, to stop the lower half of the dress from being see-through under bright lights.

With all the layers finally complete, and edged with appropriate trim where necessary, I added thick blue straps to hold it up, and to compliment the doll-like make-up design for the scene. The last step was the fitting with Sarah Lamesch, which we didn't manage to do until the day before the shoot. To save time chopping and changing the fabric, I added a lace-up ribbon back (which I don't actually have a photo of) so that it would be adjustable.
For all my moaning about the difficult crowdfunding session we had during pre-production, that's not to say that there weren't people who donated to Ashes. I still feel extremely grateful to the people who did contribute, and hopefully these posts (combined with Neil's - the latest of which you can see here) will show them how their money was put to good use.
One of the people who donated to the project was none other than Chris Laverty of Clothes on Film, the much-praised costume blog (nominated as blog of the year by Total Film and one of Channel 4's top fashion blogs), so of course, as a Costume Designer by trade, his support meant an absolute load to me.
 |
| Sarah Lamesch in costume |
Therefore, as part of my 'look where the money went' posts, it makes sense for me to talk about the costumes of Ashes, and to show you how they came into being. Bearing in mind the subject nature of the film, it's not exactly one which screams out for costume design. But with my background being what it is, I couldn't resist getting a couple of costumes into the film, and I even made one of them myself. That being the nightdress worn by Sarah Lamesch in scene 3, nicknamed the 'Toybox' scene by the crew because of Rena Kalandrani's creepy make-up.
Since I made the Toybox dress myself, I managed to take lots of photographs throughout its production, so here is the step-by-step guide to how I did it.
First of all, I chose the colour. I did an early piece of concept art for Scene Two which showed the lead character in a blue nightdress, just because it felt right as I was painting it. When we cast Sarah Lamesch, I knew I had to dress her in powder blue, not only because it was the perfect compliment to her colouring, but because it would match and enhance those incredible eyes of hers.
 |
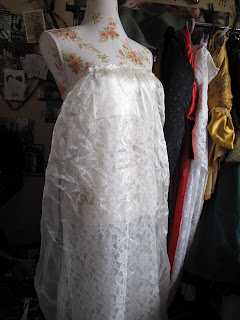
| The structured inner layer |
Oddly enough, I didn't start with a blue fabric. I made the underlayer first because I knew that it would be the most structured, fitted part, and I wanted to build onto it. I also wanted to make the outer layer in chiffon, which ranges from transparent to translucent depending on quality, and I needed to see know what would show through the outerlayer. To add a little interest here, I made sure that the majority of this layer was made of lace (basically adding a print to the dress without breaking the smoothness of the blue chiffon), but of course the top half was made from a plain fabric - satin - to preserve Sarah's dignity.
Another reason for building this layer first was that I wanted to use old fabric to save money, only buying the outer layer for the film, so I needed to pin the old pieces of fabric to the mannequin and check that we had enough.
 |
| Testing the outer-layer |
However, a mix of the many bulky layers with the fact that chiffon is notoriously difficult to work with meant that the dress finished up looking fitted on Sarah - particularly when she sat down. But sometimes you have to shut up and let the fabric tell you what to do, even when you're as stubborn as chiffon yourself!


An organza layer for bulk (left) and an opaque blue lining for safety (right).
I always believe that the difference between a party costume and one built for a film is in the detail, particularly when that detail is applied by hand, so - once all the layers had been assembled - I went back to the lace inner-layer and added a fine coating of beads and sequins. This was mostly to add an ethereal twinkle to an unnatural scene, under the right lights. But hand-sewing is also very therapeutic, and it calmed me down in the evenings after long pre-production days (remember, I wasn't only working on Ashes when I made this dress, but also preparing Stop/Eject and shooting Wasteland at the same time).
 |
| Adding some beaded detail to the dress by hand. |
With all the layers finally complete, and edged with appropriate trim where necessary, I added thick blue straps to hold it up, and to compliment the doll-like make-up design for the scene. The last step was the fitting with Sarah Lamesch, which we didn't manage to do until the day before the shoot. To save time chopping and changing the fabric, I added a lace-up ribbon back (which I don't actually have a photo of) so that it would be adjustable.
 | |
| The finished 'Toybox' dress, with the hem pinned up to show the layers. |
The funny thing is that I went to all this trouble knowing that the dress would only really be seen in one shot, when Sarah's legs would cover most of it anyway. As the director, I even designed the shot that way, to make her look vulnerable. A lot of my work on this dress was on a 'just in case' basis; I knew that under a strong key light, the chiffon would refract a block blue colour - but I thought, if we just get a glimpse of the underlayers in a close-up shot with a fill or kicker, then it would add so much interest to the shot, and look so magical.
And then, last minute, I decided the scene would look best (and by best, I mean most creepy) if Sarah was mostly bathed in shadow anyway. I got Neil to do moving shadows to create a jumping impact on her face, but never instructed him to light the dress well.
Yep, I managed to do what Peter Jackson did to Ngila Dickson, but to myself. And I don't regret it at all - the lighting highlighted the most important part of the scene, and the dress took a dignified back seat. I'm sure you'll all get a good look at it on Sarah in the behind the scenes documentary.
For now, with an exclusive first look on my blog, here is how the 'Toybox' dress features in the film itself:
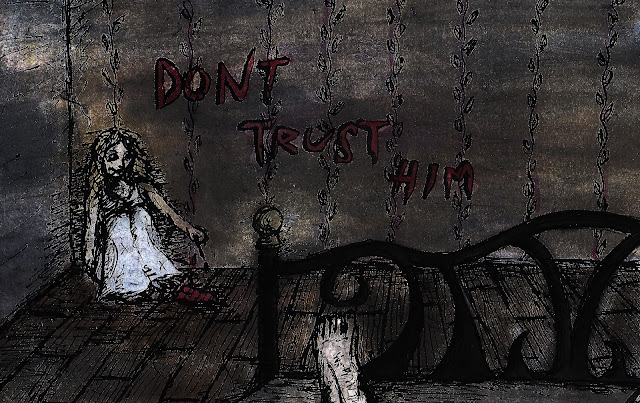
From concept art...

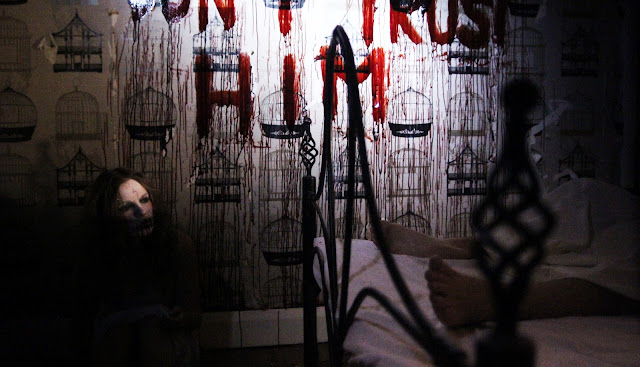
...to reality.

(Many thanks to Neil Oseman for getting that last still for me.)
Right, time to go to bed and rest before another early start on the Wasteland set. And hopefully I won't have any nightmares about how (intentionally) scary Sarah's face looks in that last shot!!
Sophie x
Comments
Post a Comment